Some people want their barrel dimensions accurate to the nearest tenth of a thou'. But in truth, the golden rule seems to be that the groove diameter must be same or less than the bullet diameter to get good accuracy. It does not seem to matter how much less you make it, one tenth of a thou' or one thou' - so long as it is less.
As a general rule, barrels with shallow grooves are better than those with deep grooves because the bullet will be distorted less. Barrels with shallow grooves reach their best quicker than deep grooved barrels - but they certainly do not last as long.
Some people say that the finish in the barrel is important and the better the finish, the better the barrel. What seems to be true is that if the finish is too good, less than 10 microinch roughness, then metal fouling tends to become a problem. It seems that in a "rough" barrel, the bullet rides on the high spots and so there is relatively little friction. But the smoother the barrel gets then the greater the surface contact with the bullet. The friction goes up and more bullet jacket gets left behind. Of course, if the barrel is too rough, then this just picks up metal and acts like sandpaper on the bullet. But there is a band of surface roughness where metal fouling is minimised which is between 10 and 20 microinches.
There have been many claims over the years that different forms of rifling profile will give better results. But so far, there is no conclusive proof that the so called concentric form almost universally used these days is any worse than any other - or any better!
What is important is that the bore and groove dimensions are uniform down the length of the barrel, that the twist rate is uniform and that the groove circle is concentric with the bore. Many think a slight choke at the muzzle end of a ten thousandth or so will improve accuracy. But bench rest shooters have shown that parallel barrels seem to win more matches than choked ones. The exception is barrels which shoot lead bullets, like .22 Rimfire barrels and air rifle barrels. These barrels definitely shoot better if there is a slight choking in the barrel. The barrel should also be completely free of stress so that as it warms up during a course of fire the barrel does not bend so leading to group shifting.
WHICH METHOD MAKES THE BEST RIFLE BARRELS?
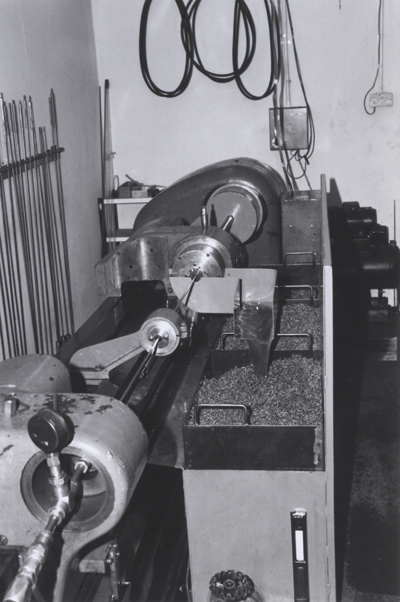
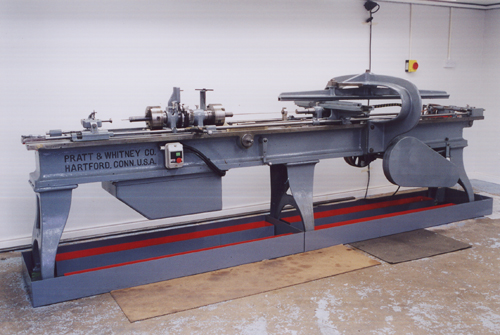
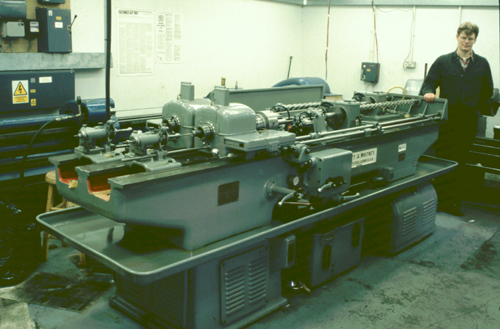
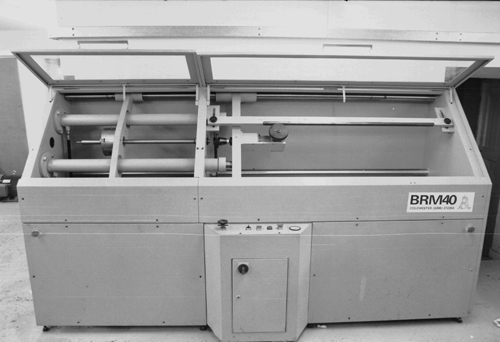
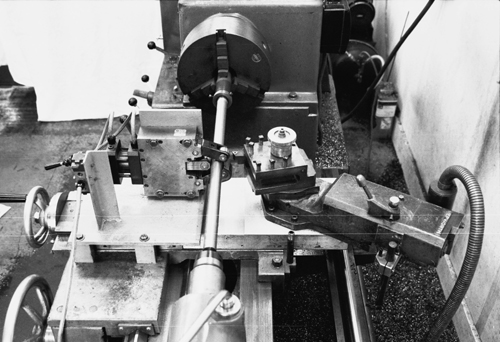
Here that at Border Barrels we used to exclusively cut rifled until the demand for our barrels outstripped capacity. The principle problem was (and is) the availability of cut rifling machines - you don't exactly trip over them at machinery auctions. Also, a high level of skill is required to maintain the tooling. Like all old technologies, cut rifling is slow and requires a high level of skill to make and maintain the tooling. This makes it expensive. The other side of the coin is that the tooling is readily made with simple machine tools and is very flexible - by which I mean that a large range of twists and bore dimensions and numbers of grooves are readily achieved using the same cutter and rifling head. This makes cut rifling an efficient way to go if you are making custom barrels in one's and two's to a customers specific requirements and you can charge a hefty sum for your efforts. But cut rifling machines are expensive to buy and expensive to operate. Some people have made their own rifling machines using CNC technology to overcome the difficulties in rifling machine design. Bartlein barrels in the United States use a home-built CNC machine. And in the UK, Holland & Holland have a CNC rifling machine.
Having started out as a custom barrel maker making custom barrels in one's and two's, we found that more and more of our work was in longer and longer runs of barrels of the same type and when it takes an hour or more to rifle a barrel, it sure leads to long days.
So we invested in plant for button rifling. The button rifling machine is relatively simple and cheap to build, (compared to a cut rifling machine), and the buttons are also available and very cheap - in terms of tooling cost per barrel. Also, no real skill is required to pull a button down a barrel. Boots was right! What all this is leading up to is that we have experience in making barrels using the two methods most commonly used in making top quality target rifle barrels and we can be pretty objective about the pro's and con's of cut rifling and button rifling. Hammer forged barrels do not have a very visible presence in the accurate gun world, so I will confine this discussion as to the relative merits of cut versus button rifled barrels.
If it is so easy to rifle barrels using a button, why do some barrel makers persist in the difficult, time consuming art of cut rifling? As outlined above it is critical in an accurate barrel that bore and groove dimensions be uniform end to end. When buttoning a barrel then it is critical that the steel be very homogeneous and of uniform hardness along the bar. If not then the button will engrave deeper into the soft parts than the hard parts so giving varying dimensions down the barrel. The button rifled barrel maker is very much in the hands of his steel mill to supply him with uniform, homogeneous steel.
The depth of engraving of the button depends also on the thickness of the bar at the point where the button is. If the bar is thin then the metal can then just expand elastically allowing the button the pass without doing much engraving. If the bar is thick there is more resistance to the button and so it will engrave deeper. To hope to get uniform bore dimensions it is critical to pull the button through a blank which has the form of a parallel cylinder. A button rifled barrel must be rifled and then stress relieved before it is profiled. There is always the problem that any residual stresses are going to make the barrel move when profiling, so leaving you with a barrel that is bent or bell-mouthed.
The tendency of the bore dimensions of non-stress relieved buttoned barrels to expand on profiling the outside had been used by some manufactures to advantage. Barrels having bore dimensions that vary over the length can be made to shoot well if the muzzle end is the tightest part of the barrel. The bullet will then make a clean exit without gas leaking around the sides to destabilise it. When mass producing barrels it is then possible to allow a fair degree of variation in the bore and groove dimensions down the barrel, provided some choking at the muzzle is included in the manufacturing process. If the buttoned barrel blank is profiled so that the last inch or so at the muzzle end is left at a larger diameter than the rest of the barrel, the expansion of the bore dimensions will be least at the muzzle so leaving a slight choke. That is why the barrels on almost all .22 target rifles look the way they do.
Cut rifling a barrel puts no stress in the steel and so it is possible to profile the barrel after the drilling stage. Any moving around the barrel is going to do will be done and the barrel can be reamed and rifled after profiling. The problem of stress induced changes in bore dimensions during manufacture can be eliminated.
When making fluted barrels, the fear is always there that putting, say, six flutes on the outside of the barrel will leave the bore shaped like a hexagon instead of round. (Like it should be!) With cut rifling, the barrel can be completely profiled and fluted after the drilling stage and then reamed and rifled. All the niggling doubts as to whether fluting the barrel will ruin it can be dispelled if it is done this way - but this manufacturing route in not available to you when you button rifle a barrel.
The exact twist of a buttoned barrel is also unpredictable. The button tends to slip in the barrel so what set out to be a 12 inch twist may end up as a 12.5 inch twist. This is not a problem if the twist is uniform, but if it varies down the barrel - particularly if it slows - then like as not, it will not shoot.
Another problem, is that the button may not engrave as deep on one side as on the other so leaving a groove circle that is not concentric with the bore. The result is bullets leaving the barrel which are not balanced and so unstable. This becomes less of a problem if you have lots of shallow grooves instead of a few deep ones.
Selection is the key to success with buttoned barrels and barrel makers like Hart, Douglas and Shillen grade their barrels by using an air gauge to judge the uniformity of bore and groove dimensions in each barrel. Ultra Premium Select barrels carry a premium price tag and are used by the bench rest fraternity. The lower grades get turned into regular target barrels and sporter barrels.
None of these problems arise in traditional single point cut rifling a barrel. Groove circle and bore are always very concentric. Because very little work is being done on each passing cut the twist rate is very consistent and very uniform. As a general rule, I find that button rifled barrels are not as uniform in bore dimensions straight off the machine as a cut rifled barrel. Button rifled barrels usually need a deal more lapping than a cut rifled barrel due to this problem.
Exact dimensions are easier to achieve by cut rifling and are not dependent on the hardness or thickness or type of steel as they are in buttoning. No stress is put into the barrel by cut rifling so no stress relieving is needed.
Many people think that the superior finish in a button rifled barrel must mean it will shoot better. In the first place, the surface finish that counts is the longitudinal surface finish, down the length of the grooves. The tool marks in cut rifled barrels go in just this direction, so causing mini-lands which are quite uniform down the length of the barrel. The transverse "roughness" caused by the lands are never viewed as an impediment to accuracy, so the mini-lands left by the tool marks in cut rifled barrels will also not affect accuracy. In the second place, the final finish in the barrel is determined by the lapping. If the cut rifling barrel maker has paid attention and kept his cutter sharp to minimise tool marks, then after lapping only a very experienced eye will be able to tell the difference between the cut rifled and the button rifled barrel.
I believe that you are more likely to get a top of the line tack driver by cut rifling a barrel than by any other method. Bench rest shooters in the States have rediscovered the cut rifled barrel and cut rifled barrel makers, who have been quietly persisting over the years with this demanding technique, find shooters at the very highest levels of accuracy banging on the doors of their barrel shops.
 For further reading on the method and practice of rifling barrels, I recommend "Rifling Machines and Methods" by Clifford LaBounty. The book is available through Border Barrels. Click on the image for further information.
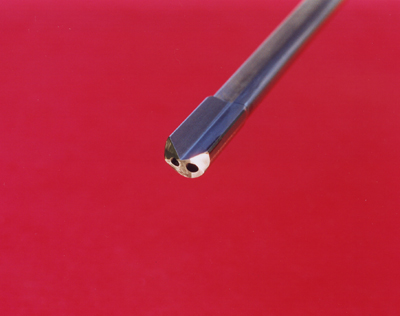

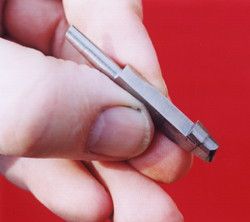
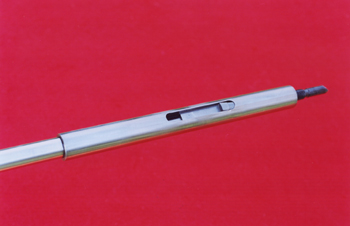
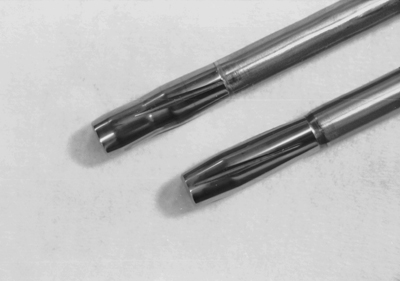
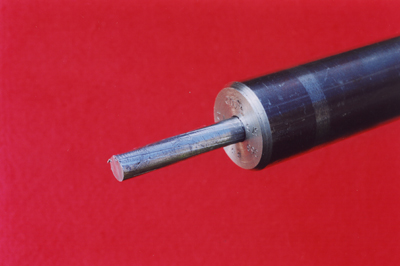 CAST LEAD LAP
A lead lap before the lapping paste is applied. The form of the lands can be clearly seen.
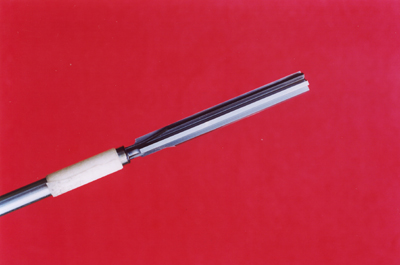
CAST LEAD LAP
A lead lap before the lapping paste is applied. The form of the lands can be clearly seen.